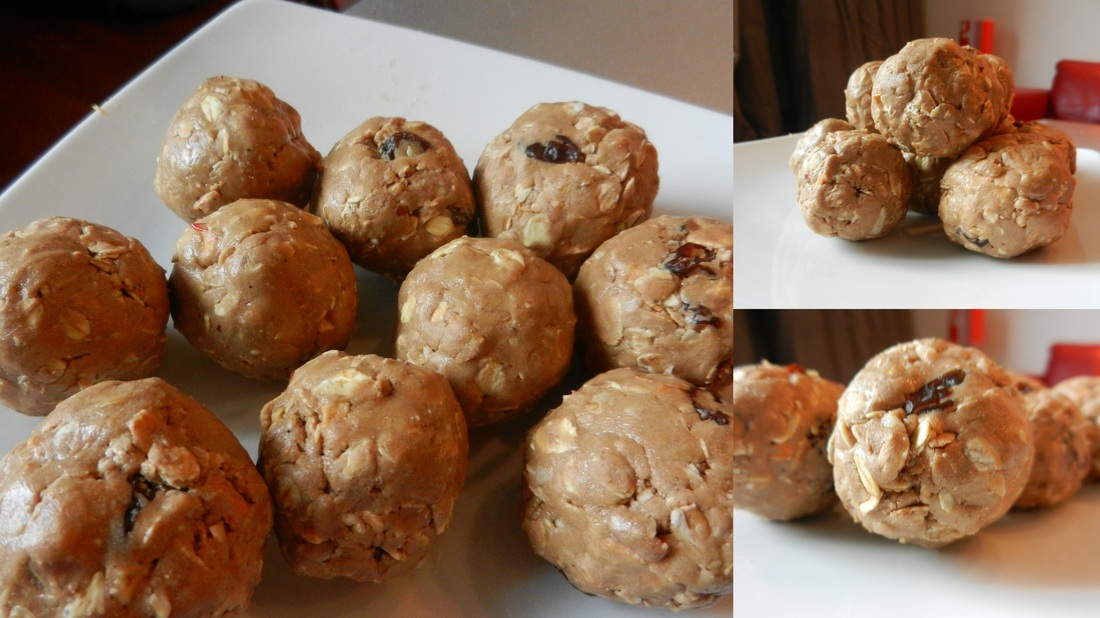
This is a snack/ dessert/ pre-workout /post-workout/ treat/ breakfast that Eric & I both love to eat. Let me warn you that they are impossible to just eat one....Chomp on one[or two] and wash it down with a cold glass of milk..soy, almond, or dairy if you prefer, and you have yourself a little party in your mouth! So YUM.
They are so versatile and tasty that it's the perfect thing to have in the fridge throughout the week. They are delicious and healthier than any store bought energy bars( Of course, I don't have to tell you that all things home made are). Plus you get the satisfaction of making them, and the ease of mind, knowing that some ingredient that you can hardly pronounce is not strategically hidden inside! =)
Oh, and did I mention they are easy to make!? That is the best part, considering my ever changing love/hate relationship with cooking.
The ingredient list is simple, and you can change it up and omit or add anything you want really based on preference and allergies!
And to be perfectly honest, when I make these at home, I do more of the "eye and pour" type method and never truly use exact amounts. I base it off of the texture I am looking for and add more or less of the ingredients as I go...BUT if you are an exact recipe type of person, here are some exact measurements.
Ingredients:
1. 1/2 cup Peanut Butter
2. 2 scoops Chocolate flavored protein powder( I just use the scoop inside the container)
3. 1/3 cup Organic Honey
*4. 1 cup Oats
*5. 1/4 cup Raisins
*6. Chopped Nuts(a handful..more or less as you like)
*I found a pre-mixed bag of oat flakes,barley flakes, sunflower seeds, nuts, raisins and dried apples that I like to use. It tastes just as good and has a few more extra goodies packed inside. So keep an eye out at the store for something like this, and just note that it works the same! I would consider it a granola of sorts
Just use 1 1/4 cup of the mixture
If the mixture is too dry, add more honey.
Directions:
1. Mix all the ingredients in a large bowl until all blended together (I used a spoon at first, then my hands to really mix the chocolate powder and peanut butter)
2. Roll into bite sized balls and eat!
3. Store them in the refrigerator
I don't know how long they are good for in the fridge because we always eat them up in a day or two....Oops.
And to be perfectly honest, I prefer them fresh and at room temperature. Hope you ENJOY!
Source: Adapted from: Live Love Pasta

 RSS Feed